I had the privilege in life not only to have a creative mother, but also to
a creative mother-in-law. I have learned so much from both of them and the
best part is that their craft interests lie in different directions. The
decoupage of ostrich eggs was one of the skills my mother-in-law passed onto
me.
Recycled items:
free-blown ostrich egg
half a plastic milk bottle (as a stand) (??what size milk bottle??)
leftover wrapping paper
You will also need:
craft knife
piece of wire
plastic syringe (medium size)
bowl
drying rack
plaster of Paris
metal bar (± 40 cm long)
acrylic paint (your choice of colour)
3 sponge brushes
± 1 litre sealant/modge podge
small sharp scissors
blue tack (e.g. Prestik)
sandpaper (very fine grain 200, 400 and 600)
damp cloth
spray lacquer/varnish
1. You can only use an empty egg. If you need to empty it yourself, pierce
both ends of a raw egg with a craft knife. Twist the knife gently to create
a small hole; the bottom hole should be a bit bigger than the top one. Use a
piece of wire to poke the yolk and break it. Hold the egg over a bowl with
the larger hole downwards. Insert the tip of a plastic syringe into the
smaller hole at the top. Blow air into the egg through the syringe or
plastic pipe until all the contents have been ejected. Rinse the egg in
lukewarm water. Leave it to dry on a drying rack overnight.
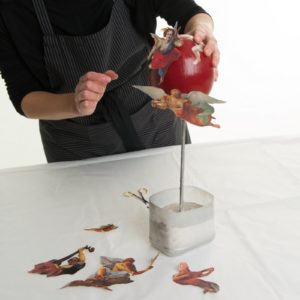
2. Place the egg on a stand while you decorate it. You can make your own in
the following way. Cut a plastic milk bottle in half horizontally. Pour a
well-mixed suspension of three cups of plaster of Paris to one cup of water
into the bottom half of the milk bottle and wait for ± 15 minutes. Push a
metal bar vertically in the centre of this mould and leave it to set
overnight. (Note: Plaster of Paris emits heat during setting, so heed the
manufacturer’s instructions and cautions). You will be able to use this
stand over and again.
3. Place the empty egg on the stand and apply 2 to 3 layers of acrylic paint
with a sponge brush, leaving each to dry before applying the next. When the
last coat is dry, protect the paint with one layer of sealant and leave it
to dry.
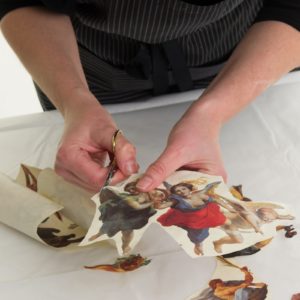
4. Paint a layer of sealant over the section of wrapping paper you’d like to
use. When the paper is dry, cut around the edges of the pictures with small,
sharp scissors. Plan the position of the images or patterns by arranging
them on the egg and temporarily securing them with blue tack. The pictures
can overlap too, if you like.
5. Working with one picture at a time, remove the blue tack and apply a
layer of sealant on the reverse side of your image. Paste it onto the egg.
Use your fingers to gently press the picture against the egg and push out
any wrinkles and excess sealant. Repeat this process with all the pictures
then cover the whole egg with a layer of sealant and leave to dry.
6. You need to apply a further 50 layers of sealant. Each layer must be
completely dry before you apply the next. This is very time consuming. Here
are a few tips to make it easier: * Use three sponge brushes – one for
current use, one to dry and one that is already dry. Clean your brush under
running water after each layer. * Leave the egg in a safe place while you
continue with other jobs. I add one layer at breakfast, another mid-morning,
one at lunch, one mid-afternoon and a final one in the evening. This allows
enough drying time between coats for the brushes and the sealant. * Make a
note, every time you apply a layer of sealant to keep track of the number of
layers added.
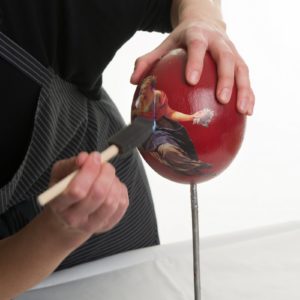
7. Well done for persevering! When the last layer of sealant is dry, it is
time for polishing and sanding. Use wet grade 200 sanding paper in small
circular motions across the whole surface of the egg. Repeat this with grade
400 and then grade 600. This is to remove all traces of brush strokes, air
bubbles or uneven spots. The final result is an impressive glass effect.

8. Use a damp cloth to wipe the sanding dust off the egg. Place the egg back
onto the stand and varnish it with spray lacquer, leaving it to dry
overnight.
9. Your decoupage egg is ready to be displayed.