
The following recycled items are required:
• Old glassware
• Pictures from cards/ internet or wrapping paper
The following items will also be required:
• Sponge to do paint dabbing
• Acrylic paint and undercoat
• Small scissors
• Modge podge and brushes
• Spray lacquer
• Dishwashing liquid
Method
1. Clean the glassware by soaking it in soapy water. Once cleaned allow it to dry.
2. Ensure that your work space is well protected. For smoother coverage, do not use a brush, but rather use a sponge and begin to dab, meaning, lightly press against the surface of the glassware to cover it with the undercoat. Allow to dry. Now you can start to paint, use the same technique and leave it to dry before applying another layer of paint.
3. For the best coverage and smooth finish, I suggest that you paint your glassware with at least three to four layers of paint. Allow each layer of applied paint to dry before you add the next. Once you are happy you can start the decoupage.
4. Before you cut out your images, first coat them with a sealant, Modge podge or PVA glue, then leave them to dry.
5. Cut around the edges of your sealed images. You can either use a pair of scissors or if your images are intricate, you can use a craft knife and cutting mat.
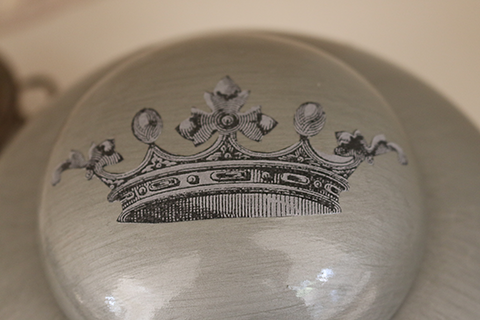
6. Now you can decide how you want to arrange the images on glassware object. The images can be any design and they can overlap each other.
7. Once you are satisfied with your design, paint a layer of sealant on the reverse side of your first image. Place it in position and press it down gently and rub over it with your fingers or a damp sponge to smooth away any air bubbles and excess glue. Repeat this process with each image. Once you have glued all your images onto the surface of the object, proceed to paint a coat of sealant over the surface to protect your images. Allow the sealant to dry and then repeat the process with a second coat of sealant.
8. When you are satisfied with your object, apply the varnish. (Follow the manufactured instructions on the can on how to apply) This serves to protect the object, as well as your decorative work, from heat and water damage.